Turning two small spaces into one big space...
Hello guys and gals, how are we all this week?
I've been looking back through pictures of the house again, pictures from when we first viewed it, and I still can't believe how far we've come with it! This week I'm going to share the bathroom refit with you. This was one of the first rooms we (the builders) tackled and one of the rooms I was most excited about...
We had previously refurbished a flat before this house but made do with how the bathroom was, one of the only rooms we didn't touch in that place. Therefore I couldn't wait to turn ideas that had been whirling around in my head into reality.
So here are some before pictures...


Again, like the kitchen refit, as soon as I saw the bathroom I knew exactly how I would like it to be. In these pictures it shows how the toilet and bathroom were separate and although it is handy to have a separate toilet, I thought the space could be used so much more effectively.
My other half is a bit of a giant and he always wanted to have a separate shower, rather then a shower over the bath and to do this (and not loose the bath altogether) it made perfect sense to knock the two rooms into one.
So that is what happened.... Looking at the picture on the left you can see the door to the bathroom and to the right of that was the very small toilet...
And on the picture to the right you can see how the doorway to the bathroom was bought forward into the landing, to the edge of the stairs. Although we only gained a small amount of space it meant, once the wall between the two rooms had gone, that there would be room for a bath and a sshower unit.
So walls came down, old bathroom suits where ripped out and walls were plastered. We didn't live in the house when all of these bit was being done and looking back at these pictures now, thank goodness!!!


Well, I didn't know you could be in love with a radiator before this bathroom (dramatic much?!?) and I know how much Neil loves the shower. Apparently this is the first shower that he can actually stand fully under, the builder measured how tall he was so he could make sure that could happen! It's all in the details.


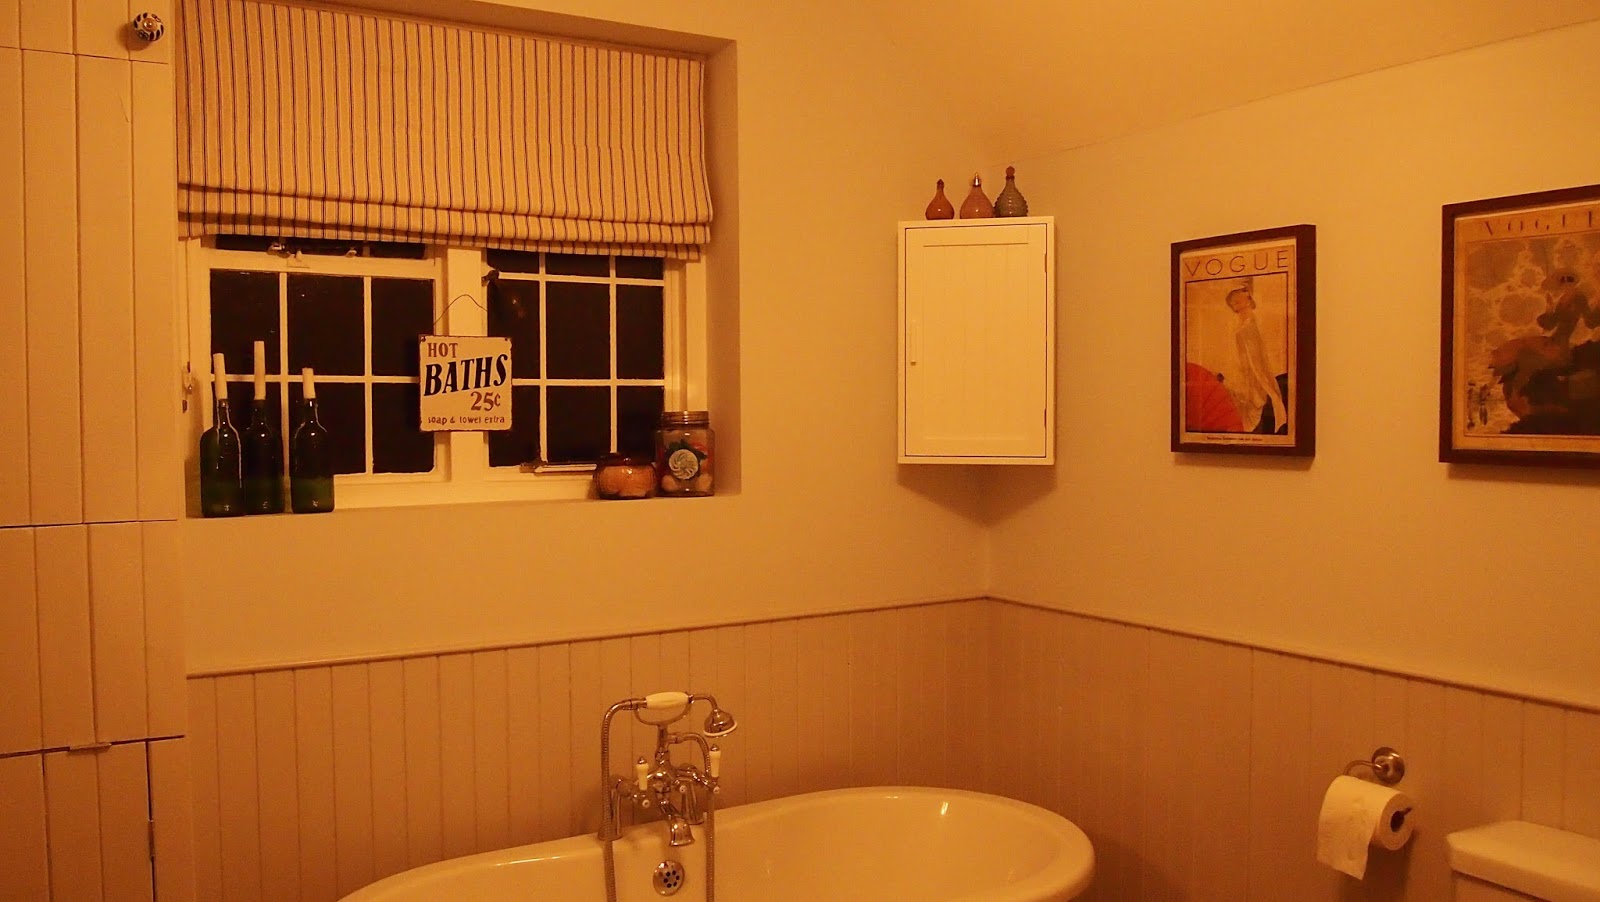
I don't think I've ever lived in a house where I have filled the walls of the bathroom with pictures and I really think it brings more to the room. The bathroom is often a place that can be neglected when it comes to displays but it can really turn it into a much more cosy place to be.

Hello guys and gals, how are we all this week?
I've been looking back through pictures of the house again, pictures from when we first viewed it, and I still can't believe how far we've come with it! This week I'm going to share the bathroom refit with you. This was one of the first rooms we (the builders) tackled and one of the rooms I was most excited about...
We had previously refurbished a flat before this house but made do with how the bathroom was, one of the only rooms we didn't touch in that place. Therefore I couldn't wait to turn ideas that had been whirling around in my head into reality.
So here are some before pictures...
Again, like the kitchen refit, as soon as I saw the bathroom I knew exactly how I would like it to be. In these pictures it shows how the toilet and bathroom were separate and although it is handy to have a separate toilet, I thought the space could be used so much more effectively.
My other half is a bit of a giant and he always wanted to have a separate shower, rather then a shower over the bath and to do this (and not loose the bath altogether) it made perfect sense to knock the two rooms into one.
 |
| Before... |
So that is what happened.... Looking at the picture on the left you can see the door to the bathroom and to the right of that was the very small toilet...
 |
| After |
And on the picture to the right you can see how the doorway to the bathroom was bought forward into the landing, to the edge of the stairs. Although we only gained a small amount of space it meant, once the wall between the two rooms had gone, that there would be room for a bath and a sshower unit.
So walls came down, old bathroom suits where ripped out and walls were plastered. We didn't live in the house when all of these bit was being done and looking back at these pictures now, thank goodness!!!
Where the shower unit ended up being placed is where the toilet room used to be. I remember feeling so happy at this point, seeing it all in place. Neil (the other half) had pretty much let me tell the builder where I wanted everything, because he just couldn't imagine where it would all go. Pressure!!! So I was pleased and relieved when it all ended up fitting into place just as I had imagined.
I wanted the suit, fixtures and fittings to be traditional to suit the style of the house. I actually wanted to keep the old sink and the toilet as the style was perfect but they were broken when they were ripped out and the builder helped us to source pieces that were not to dissimilar.
So it was all in! Time to make it look less Swedish sauna and more... elegant, I guess!
I took a very long time deciding what colours to paint this room and ended up colour matching with a Dulux paint to Farrow and Ball's Cornforth White on the panelling and Blackened on the walls. I always said I didn't want a blue bathroom in case it felt too cold and I remember really panicking that it was too blue when we first painted it. In the end, with the warmth of the dark wood flooring, toilet seat and picture frames it ended up feeling classic and warm, not cold in the slightest. Anyway, I can't see the blue in it any more but I think you always have a moment of dread after you have spent hours painting a room.
On to the favourite parts of the room...
Well, I didn't know you could be in love with a radiator before this bathroom (dramatic much?!?) and I know how much Neil loves the shower. Apparently this is the first shower that he can actually stand fully under, the builder measured how tall he was so he could make sure that could happen! It's all in the details.
I don't think I've ever lived in a house where I have filled the walls of the bathroom with pictures and I really think it brings more to the room. The bathroom is often a place that can be neglected when it comes to displays but it can really turn it into a much more cosy place to be.
The floor was another big success of the room. We ended up going for a dark laminate but it has rubber seals through the joins. It is from Quick Step and is called ship deck laminate you can read about it here our builder recommend it to us and I really love it.
So there's the bathroom. I hope that might of given you some ideas for your own bathroom. Now if you don't mind I'm off to have a bubble bath.
Amy x


.jpg)


